Last week, while looking on Pinterest, I came across a recipe for Chicken and Dumplings Casserole. I am always looking for easy dishes as I have mentioned before and again, I find such great things on Pinterest. This time however, I could not get the recipe to come up when I clicked on the picture, so I just went ahead a did a google search. There were actually several different recipes listed, but the one I chose I knew would be simple and that is just what I needed.
Unfortunately, I do not have any pictures, but I hope that does not deter you from trying this, as it was super delish. Basically the 9x13 pan was wiped clear in 24 hours if that tells you anything!
I also sauteed some fresh spinach and garlic in a little olive oil as a side. I am really trying to be good about adding in the greens to every meal these days!
So I hope you enjoy this easy and yummy dish!
Chicken and Dumplings Casserole- Courtesy of www.plainchicken.com
http://www.plainchicken.com/2011/11/chicken-dumpling-casserole.html
3-4 cups of cooked chicken (I used a rotisserie chicken)
2 cups chicken broth
1/4 cup unsalted butter
1 cup flour
1 1/4 tsp baking powder
1/4 tsp salt
1 cup milk
1 can Campbell's cream of chicken soup
Preheat oven to 400.
Melt butter in the microwave and pour into bottom of a 9x13 pan. Shred the chicken and spread it on top of the butter.
Whisk together the milk and the flour, baking powder and salt. Slowly pour over the chicken. Don't stir.
Whisk together chicken broth and cream of chicken soup. Pour soup over the flour and milk mixture. Don't stir.
Bake uncovered for 35 to 45 minutes, or until dumplings are golden brown.
Enjoy!
Tuesday, September 18, 2012
Rigatoni with Chicken and Broccoli in Lemon Cream Sauce

Over the past few weeks I have been a mad woman pinning food on Pinterest! It is such a great place to look for new dinner ideas! I love it! I came across one dish that looked super yummy and I wanted to try it that night, but I did not have all that it had called for. So I took a look around the kitchen and came up with a similar dish, but with my own personal touches;)

It was already pretty late to start cooking, so I wanted to make it the fastest way I could and the easiest! I decided that instead of marinating and grilling the chicken like the recipe I saw, I defrosted and just baked the chicken to cube it. This recipe did not have any broccoli in it, but we needed some veggies for sure, so I steamed what we had and chopped it up as well and put it to the side.

While the rigatoni was boiling in a saute pan I melted about 3 tablespoons of butter and browned some garlic. I then added in the juice of two lemons, a dash of dried basil, a pint of heavy cream and a container of shredded parm. I let that simmer together for about 10 mins or so. Once the pasta was done, I drained that, added in the cubed chicken and broccoli and poured the sauce over it all in the pot. After mixing well, it was ready to serve with hot garlic bread! I have to say although there was a good bit of heavy cream and cheese in the sauce, the lemon really lighted up the flavor! So for just throwing this all together, I think it came out great and I would make it again for sure.
Enjoy-
Banana Split Ice Cream Cake

Yesterday was my boyfriend's birthday! He is a big ice cream fan, especially loves a banana split. So when I started thinking about what to make for his birthday cake, I immediately thought of a banana split ice cream cake! I took a look around at a few sites to see if anyone had made one, there were a few out there, but I already had an idea of how I would make this one. I have to say, it is time consuming but very easy to make! He LOVED it and I loved making it. I would make it again in a heart beat! You can't go wrong as there is a little something in there that everyone has to love;)

I used a spring form pan for this cake.
For the crust, I ended up using chocolate Teddy Grahams as I could not find chocolate graham crackers at the store that day. You will need about 1.5-2 cups of crushed graham cracker/cookies depending on the size of your pan. Add in about 1/3 cup of sugar and 4 tablespoons of melted butter. Mix all together, pat into the bottom of the pan ( I sprayed the bottom and sides of the pan with Pillsbury baking spray, but many people say to use parchment paper. We had no issues getting the cake out doing it this way) Preheat the oven to 375 and bake for about 7-9 mins. Let cool.
For the ice cream layers, I ended up getting two- one gallon containers of Harris Teeter Neapolitan ice cream as they have the vanilla, strawberry and chocolate all in one and it was buy one get one free!! It was the perfect amount as well which was great! I even had a little of all three flavors left over.
For the first layer I took out all of the strawberry ice cream and got it as soft as I could with out it being too melted, I spread over the cooled crust and put it back in the freezer for about 30-45 mins to harden back up. I then topped it with strawberry ice cream topping- I can't recall who made it, but it is where all the ice cream toppings and cones are in the store. I put that back into the freezer for another 15- 20 mins. I did this same process for the vanilla and chocolate layer. I used pineapple topping on top of the vanilla and then once the chocolate was added, I just covered and put back in the freezer. I did not add the fudge until the pieces were cut. Once sliced, I added the hot fudge, sliced banana's, whipped cream and a cherry on top!
You can really use whatever flavors and toppings in between layers that you would like, but these are the typical banana split toppings and what he wanted as well!
Overall, it was a big hit! Super yummy, total crowd pleaser!

Tuesday, September 4, 2012
Blueberry Goat Cheese Tart

I called my mom to see what she thought. She is the one person I can call and list off things in my kitchen and she has a gourmet meal in mindin minutes. I so wish I was like that. I tell her all the time she should go on a reality top chef type show or that show that Rocco DiSpirito did, but she would never...such a shame as I would totally enjoy spending her winnings! ha Anyway, she agreed and thought I should definitely try this idea out. I looked up a few recipes that sounded similar, but some were a little too complicated or incorporated way too many ingredients. Hey, whats the worst that could happen right...so I tried it!
Basically I just followed the directions for cooking the puff pastry. Heat the oven to 400 degrees and bake for about 15 min or until golden brown. I decided to use a pizza pan with holes to lay the pastry on as I know when cooking it in my brie recipe the bottom always seems gooey and I knew that would not be good for this. I spread the pastry out in the best circle I could and folded up the edges a little. In a small bowl I melted a small container of crumbled goat cheese. I then spread that in the middle of the pastry and then sprinkled the blueberries op top. I drizzled that with the cinnamon honey, dusted the edges with egg yolk and into the oven it went.
If I remember correctly I had to keep it in a little longer than 15 mins, but no more than 20. Once it cooled I used a pizza slicer and cut it into appetizer size pieces! I have to say, it was really yummy, great flavor combo and I would make it again for sure. It was even good cold out of the fridge...I had to give the rest of it away as I could not stop eating it...oops!

Enjoy!
Lemon Yogurt Cake Strawberry Shortcake!

I had a few days before her arrival so I was all over looking for the perfect recipe. As per usual I got onto Foodgawker.com and typed in Lemon Yogurt Cake. A few recipes popped up and it turns out all the recipes came from the Food Network Site through Barefoot Contessa.
I knew that I would be making the whipped cream from scratch as it is super easy and so much better than cool whip or reddi whip hands down. I also lucked out that the strawberries that week at the store looked fabulous! Yay, I knew this was gonna be delish!!! And as it turns out, it was a crowd pleaser! As even after a great birthday dinner and totally stuffed, we all still managed to clear the dessert plates! So overall it was a great day, great food, awesome birthday cake and most of all great company!
Lemon Yogurt Cake- Courtesy of Barefoot Contessa
Ingredients
- 1 1/2 cups all-purpose flour
- 2 teaspoons baking powder
- 1/2 teaspoon kosher salt
- 1 cup plain whole-milk yogurt
- 1 1/3 cups sugar, divided
- 3 extra-large eggs
- 2 teaspoons grated lemon zest (2 lemons)
- 1/2 teaspoon pure vanilla extract
- 1/2 cup vegetable oil
- 1/3 cup freshly squeezed lemon juice
For the glaze:
- 1 cup confectioners' sugar
- 2 tablespoons freshly squeezed lemon juice
Directions
Preheat the oven to 350 degrees F. Grease an 8 1/2 by 4 1/4 by 2 1/2-inch loaf pan. Line the bottom with parchment paper. Grease and flour the pan.
Sift together the flour, baking powder, and salt into 1 bowl. In another bowl, whisk together the yogurt, 1 cup sugar, the eggs, lemon zest, and vanilla. Slowly whisk the dry ingredients into the wet ingredients. With a rubber spatula, fold the vegetable oil into the batter, making sure it's all incorporated. Pour the batter into the prepared pan and bake for about 50 minutes, or until a cake tester placed in the center of the loaf comes out clean.Meanwhile, cook the 1/3 cup lemon juice and remaining 1/3 cup sugar in a small pan until the sugar dissolves and the mixture is clear. Set aside.
When the cake is done, allow it to cool in the pan for 10 minutes. Carefully place on a baking rack over a sheet pan. While the cake is still warm, pour the lemon-sugar mixture over the cake and allow it to soak in. Cool.
For the glaze, combine the confectioners' sugar and lemon juice and pour over the cake
For the whipped cream- courtesy of my momma;)
I could have used a little more to be honest as there were 6 of us, but I scraped the bowl and it was just enough. If I did it again, I would use a larger container of whipping cream.( 1 pint vs. what I used which was the smallest container.) Add in about a teaspoon of vanilla and then sugar to your taste. I really just eyeballed it...but if you look it up most say about a tablespoon per cup of whipping cream.
And lastly, one carton of fresh strawberries sliced.
Enjoy!
Wednesday, August 1, 2012
Chili Lime Shrimp Cups and Orzo Salad

A few months back I had a few friends over for dinner. I had come across this recipe for Chili Lime Shrimp Cups on Foodgawker.com, the actual blog they were listed on is called "Inspired Taste". Not too long before I planned this dinner, I was out and about shopping. I had gotten a ten dollar coupon for World Market, no purchase necessary so being the bargain shopper that I am, I had to go see what I could find under ten dollars! ha I had something in mind though, a mini muffin pan. And guess what...they had one for 8.99 or something close to that..gotta love free stuff right! Anyway, this is why I wanted to make the Chili Lime Shrimp cups;)
My friend Scottie suggested an Orzo Salad to go with the shrimp. She had recently made it for another party and said it was a total crowd pleaser, so I was all about it! Unfortunately, the only picture of have of the dish is above, but I think it gives a good idea of how tasty everything looked, or at least I hope it does.
The shrimp cups were super easy to make and the orzo salad actually was as well. I have to say it was delish and I made Scottie give me the recipe before leaving. I made it the next weekend for a picnic and everyone loved it. It is super light and refreshing, a perfect side dish for summer if you ask me! I am not actually sure where she got the recipe, but it is below for you to enjoy!
Orzo Salad- Courtesy of Scottie :)
Serves 4
Fresh Spinach (2-3 cups)
1 Yellow Pepper diced
1 cup grape tomatoes cut in half
1/2 cup feta cheese
orzo pasta (cooked 2-3 cups)
Dressing:
1/4 cup or more Olive Oil (based on how much lemon taste you like)
1/8 cup Lemon Juice
1 table spoon mince garlic
salt & pepper
In a large bowl, combine fresh 2 cups spinach, 1/2 tomatoes and 1/2 chopped pepper - cook orzo based on directions. Drain and while still hot, pour over veggies to cook just a bit. Allow to sit for 10 mins covered. Once cooled down, add remaining cup of spinach, tomatoes, peppers and feta cheese toss with dressing - Can be eaten warm or chill for 30 mins before eating.
Chili Lime Shrimp Cups- courtesy of Inspired Taste
Ingredients
- 24 wonton wrappers
- 2 tablespoons olive oil
- 24 medium shrimp, peeled and deveined
- 1/2 teaspoon salt
- 1 teaspoon chile powder
- 2 limes
- 1/2 cup arugula
- 3 tablespoons sour cream
Method
- Preheat oven to 350 degrees F.
- Prepare wonton shells. Lightly brush wontons with 1 tablespoon of olive oil. Arrange in 24 mini muffin/cupcake cups. Bake 5-7 minutes until golden brown and crisp.
- Toss shrimp with 1 tablespoon of olive oil, salt, 2 teaspoons of lime zest and chile powder. Bake 5-8 minutes until shrimp are opaque throughout.
- To assemble, fill each wonton cup with a few leaves of arugula, a small dollop of sour cream, one shrimp then top with a spritz of lime juice.
Enjoy- I know we did!!
Friday, July 27, 2012
Lunch at Dandelion Market

About two months ago I started a new job in uptown Charlotte. It has been a long time since I have had to go into an office. However, I was excited, why you ask, because that means I can go out to lunch now!!! For the last 6 years I have worked from home and don't get me wrong, I loved it. Gym clothes everyday, roll out of bed, home cooked meals verses going out. Being back in the office I knew would be a big change, but I was ready for a change!
Now I have to admit, I only go into the office about three days a week, which I think is great. Gives me a chance to see my team and socialize and of course wear all my new work clothes! ha But I still do bring my lunch most days, but yesterday was not so much! I knew I had meetings most of the day, so right away I reached out to my fabulous new co-worker and by the way, a fellow blogger(www.freakycurry.blogspot.com) Riddhi to see if she was up for some lunch time fun...and, as I thought, she totally was!
We decided on Dandelion Market, which is right around the corner from our office. We both knew we would be famished as our meetings went until 2pm, so we ate a healthy breakfast so we could stuff our faces when we got there! I have been to Dandelion a few times and love it! It is a great menu and killer wine prices. So if you have not checked it out, you must do so!
We both ordered the same thing, the grilled cheese (pictured above) with prosciutto and Ridhhi had added tomato as well and it came with their creamy tomato soup. As you can see by the picture, it was KILLER. I mean three cheeses oozing out of the thick BUTTERY (in caps as it was loaded up with butter- and I am NOT complaining about that) bread, with prosciutto - how can you go wrong, it was grilled to perfection and the soup rocked. I think I dipped my sandwich in the soup for almost every bite and yes, I ate the whole thing, no holding back on my end that is for sure!

OINK OINK!!!
So there you have it, a delicious lunch with some great company!! Looking forward to my next lunch outting uptown!! Next time, maybe a little healthier??!?!?! ...ha who am I kidding;)
Enjoy-
Blueberry and Raspberry Buttercream Birthday Cupcakes!


Well this year she was having a little get together, so I only found it fitting to make LOTS of cupcakes. When I say lots, I think there were about 60!! (mini and regular). Heather loves fruit and loved the raspberry last year, so this year I decided to make both vanilla and lemon cupcakes (box mix- Pillsbury due to the quantity) but made fresh blueberry and raspberry buttercream icing.


Overall they were a great success, only a few left as I was leaving the party, so I was happy as was the birthday girl and that is what really matters right!?!

Basic Buttercream Recipe- courtesy of Foodnetwork.com
Ingredients
- 3 cups confectioners' sugar
- 1 cup butter
- 1 teaspoon vanilla extract ( 1 teaspoon of raspberry extract for the raspberry butter cream)
- 1 to 2 tablespoons whipping cream
- I added about one carton of blueberries and one of raspberries to each batch of icing I made
Directions
In a standing mixer fitted with a whisk, mix together sugar and butter. Mix on low speed until well blended and then increase speed to medium and beat for another 3 minutes.
Add vanilla and cream and continue to beat on medium speed for 1 minute more, adding more cream if needed for spreading consistency.Enjoy-
Monday, March 26, 2012
White Chocolate Fruit Tart

The recipe is courtesy of AllRecipes.com-
Ingredients
- 3/4 cup butter, softened
- 1/2 cup confectioners' sugar
- 1 1/2 cups all-purpose flour
- FILLING:
- 1 (10 ounce) package vanilla or white chips, melted and cooled
- 1/4 cup heavy whipping cream
- 1 (8 ounce) package cream cheese, softened
- 1 (20 ounce) can pineapple chunks, undrained
- 1 pint fresh strawberries, sliced
- 1 (11 ounce) can mandarin oranges, drained
- 2 kiwifruit, peeled and sliced
- GLAZE:
- 3 tablespoons sugar
- 2 teaspoons cornstarch
- 1/2 teaspoon lemon juice
- In a small mixing bowl, cream butter and confectioners' sugar until light and fluffy. Gradually add flour; mix well. Press into an ungreased 11-in. tart pan with removable bottom or 12-in. pizza pan with sides. Bake at 300 degrees F for 25-30 minutes or until lightly browned. Cool on a wire rack.
- For filling, in a small mixing bowl, beat melted chips and cream. Add cream cheese and beat until smooth. Spread over crust. Refrigerate for 30 minutes. Drain pineapple, reserving 1/2 cup juice; set juice aside. Arrange the pineapple, strawberries, oranges and kiwi over filling.
- For glaze, in a small saucepan, combine sugar and cornstarch. Stir in lemon juice and reserved pineapple juice until smooth. Bring to a boil over medium heat; cook and stir for 2 minutes or until thickened. Cool; brush over fruit. Refrigerate for 1 hour before serving. Refrigerate leftovers.
Oatmeal Raisin Cookies

They came out delish! The only thing I did differently was to add a little brown sugar to the top of the cookies before they went into the oven.

Ingredients-
1/2 cup (1 stick or 4 ounces) butter, softened
2/3 cup light brown sugar, packed
1 egg
1/2 teaspoon vanilla extract
3/4 cup all-purpose flour
1/2 teaspoon baking soda
1/2 teaspoon ground cinnamon
1/4 teaspoon salt (I often use a half teaspoon, but I like more salt in my baked goods)
1 1/2 cups rolled oats
3/4 cup raisins
Directions-
Preheat oven to 350 degrees.
In the bowl of a stand mixer, cream together the sugars, butter, egg and vanilla.
In a separate bowl, whisk together the flour, soda, cinnamon and salt.
Add the flour mixture to the sugar mixture and mix well. Add the oats and raisins and stir together well. Drop by the tablespoon on a baking sheet lined with parchment paper or a silicone mat. They should be about two inches apart.
Bake for 10 to 12 minutes until the edges have just started to turn brown.
The centers should still be a bit gooey.

Thursday, March 15, 2012
Peach Crumb Bars


Enjoy-
Peach Crumb Bars- adapted from Brown Eyed Baker
Peach Crumb Bars
Yield: 24 bars
For the Dough:
3 cups all-purpose flour
1 cup granulated sugar- I used 1/2 brown and 1/2 white
1 teaspoon baking powder
¼ teaspoon salt
1 cup (2 sticks) unsalted butter, cold
1 egg, lightly beaten
For the Filling:
5 cups diced or sliced peaches (about 7 peaches, peeled)- I used 4 and some homemade peach jam.
2 tablespoons lemon juice
½ cup all-purpose flour
1 cup granulated sugar
¼ teaspoon salt
½ teaspoon ground cinnamon
¼ teaspoon ground nutmeg
1. Preheat the oven to 375 degrees F. Grease a 9×13-inch baking pan.
2. For the Dough: In a medium bowl whisk together the flour, sugar, baking powder and salt. Use a pastry blender to cut in the butter, and then the egg. The dough will be crumbly. Pat half of the dough into the prepared pan. Place the pan and the remainder of the dough in the refrigerator while you prepare the filling.
3. For the Filling: Place the diced (or sliced) peaches in a large bowl and sprinkle with lemon juice. Mix gently. In a separate bowl whisk together the flour, sugar, salt, cinnamon and nutmeg. Pour over the peaches and mix gently.
4. Spread the peach mixture evenly over the crust. Crumble the remaining dough over the peach layer.
5. Bake in the preheated oven for 45 minutes, or until the top is slightly brown. Cool completely before cutting into squares.
(Dough recipe adapted from Smitten Kitchen; Filling recipe from Allrecipes)
Thursday, March 8, 2012
Gigi's Cupcakes

About two weeks ago I stumbled upon this new cupcake bakery over in the South Park area of Charlotte, Gigi's Cupcakes. How I did not already know it existed still blows me away, as I am always on top of new places opening up..especially when cupcakes are involved and it is only about 5 mins from my house!!
My friend Kristen and I decided to venture on in after our pedicures and see what it was all about. To our surprise we learned it was a chain. Neither one of us had ever heard of it before, but it seems they have over 50 locations all over the US.

On the counter sat a coupon and a daily menu and we all know how much I love menu's so I grabbed both! Since the coupon was for buy 3 get one free, we had to get 4 right?!?
It was about 20 or 30 mins before closing time, so unfortunately they were out of quite a few selections. However, there were still plenty to choose from and I think we made some pretty good decisions on our choices!
They always have a special of the day and that day it was "Tropical Breeze". Now I could be wrong on the exact description as it is not listed on their menu, but I think it was a key lime cake with a cream cheese frosting, possibly flavored a bit and topped with toasted coconut! Either way, it was actually my favorite of the 4 we got!

The next one we got was called "Midnight Magic- Chocolate Chip".


Enjoy!!
Gigi's Cupcakes of
Charlotte, North Carolina
Mon-Sat: 10 am - 7 pm
Sun: 11 am - 5 pm
Phone: (704) 643-7117 begin_of_the_skype_highlighting (704) 643-7117 end_of_the_skype_highlighting
4732 Sharon Road, Suite M.
Charlotte, North Carolina 28210
Located in South Park's Sharon Corners Shopping Center!
Wednesday, February 15, 2012
Valentine's Day Ice Cream Cake


Banana Muffins with Peanut Butter M&M's
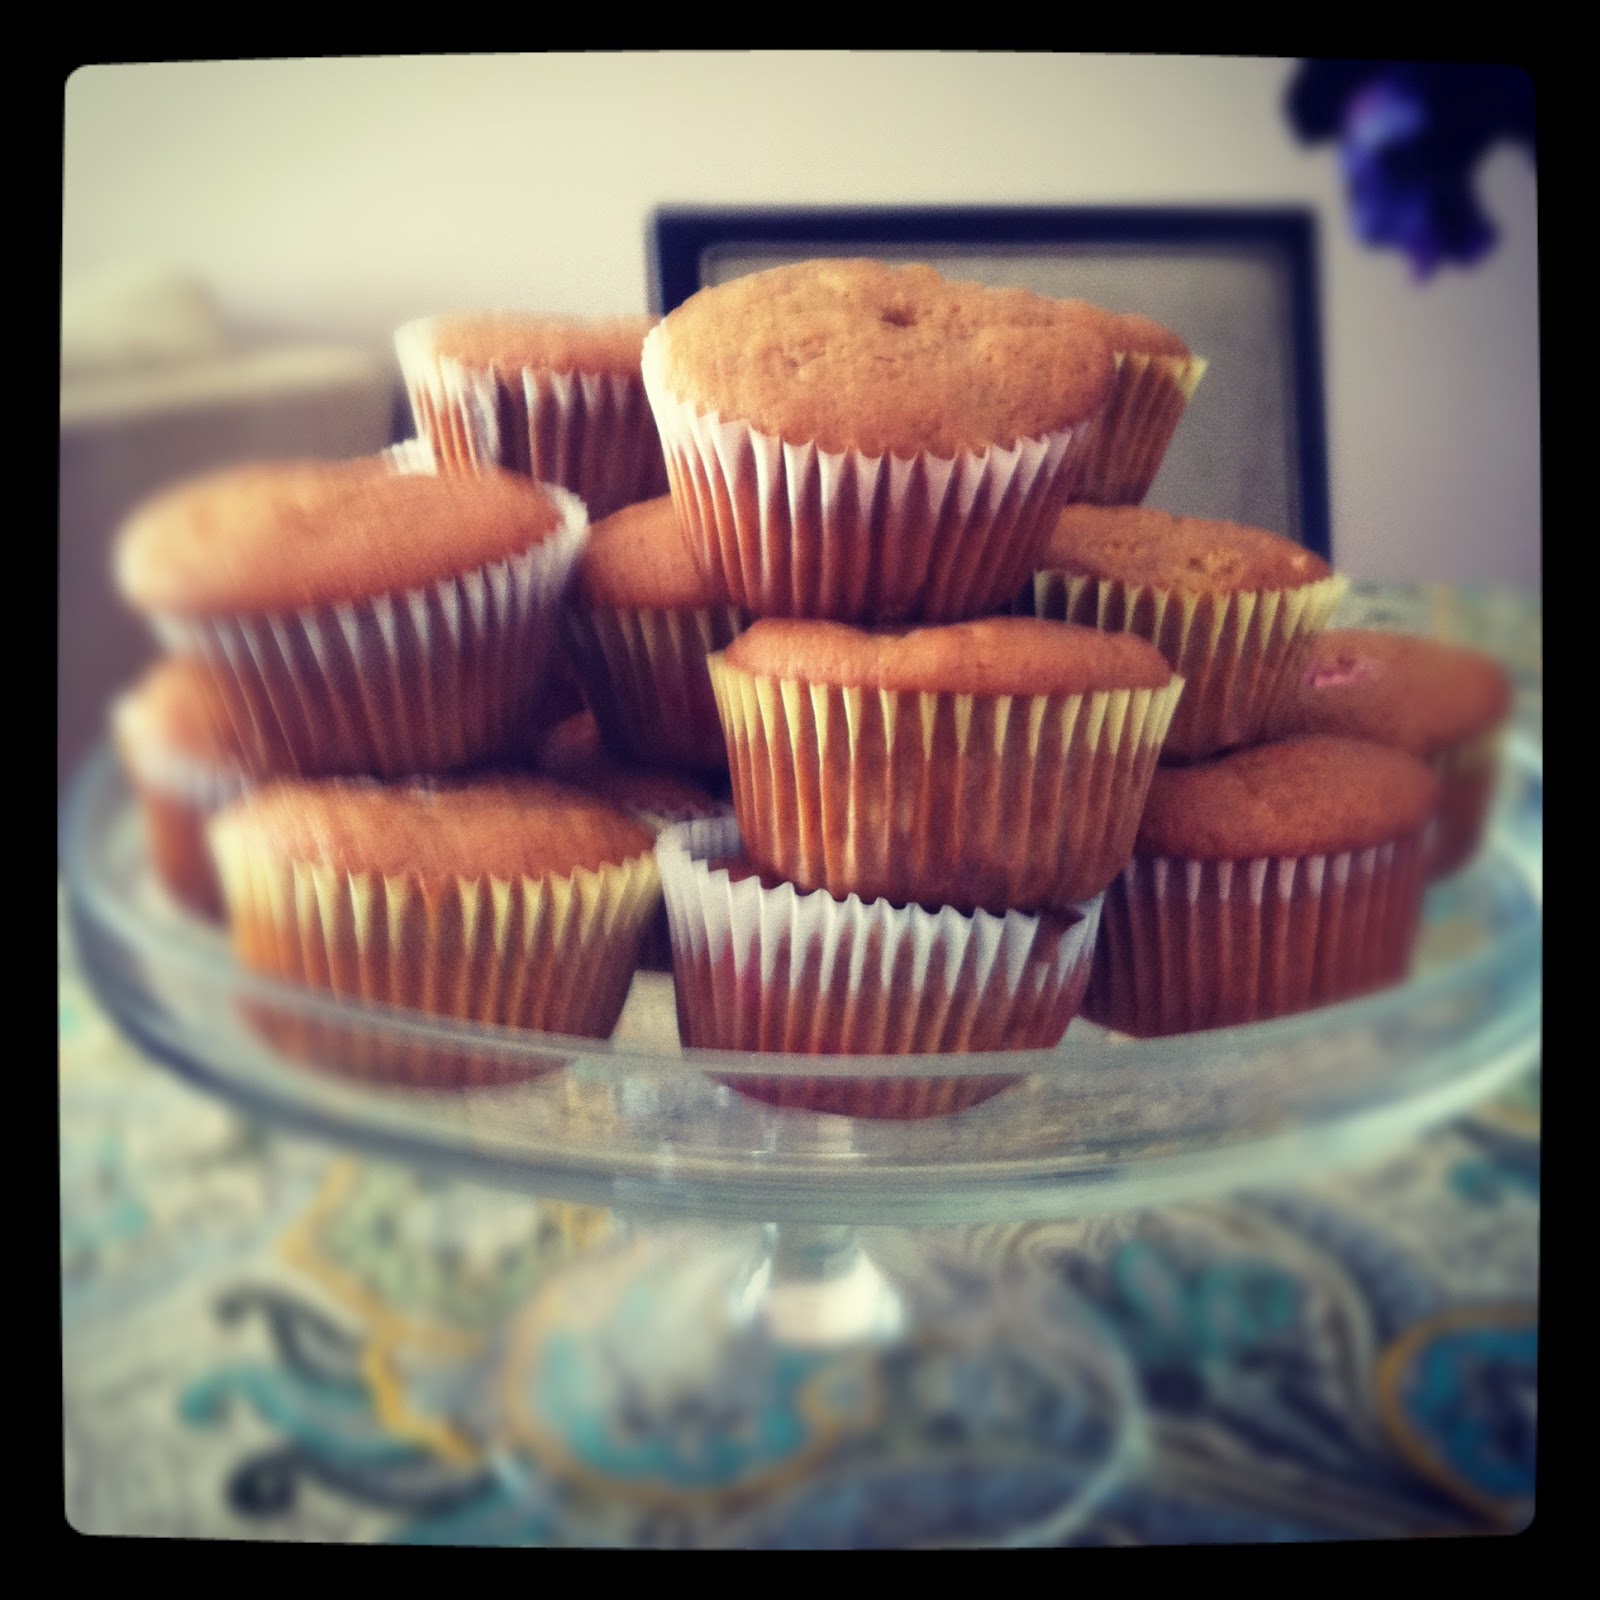
Now I have always been a fan of peanut butter and banana. I remember about a year ago I think I ate it on an english muffin for about a year straight, no joke! As most of my friends know I am a total creature of habit;)
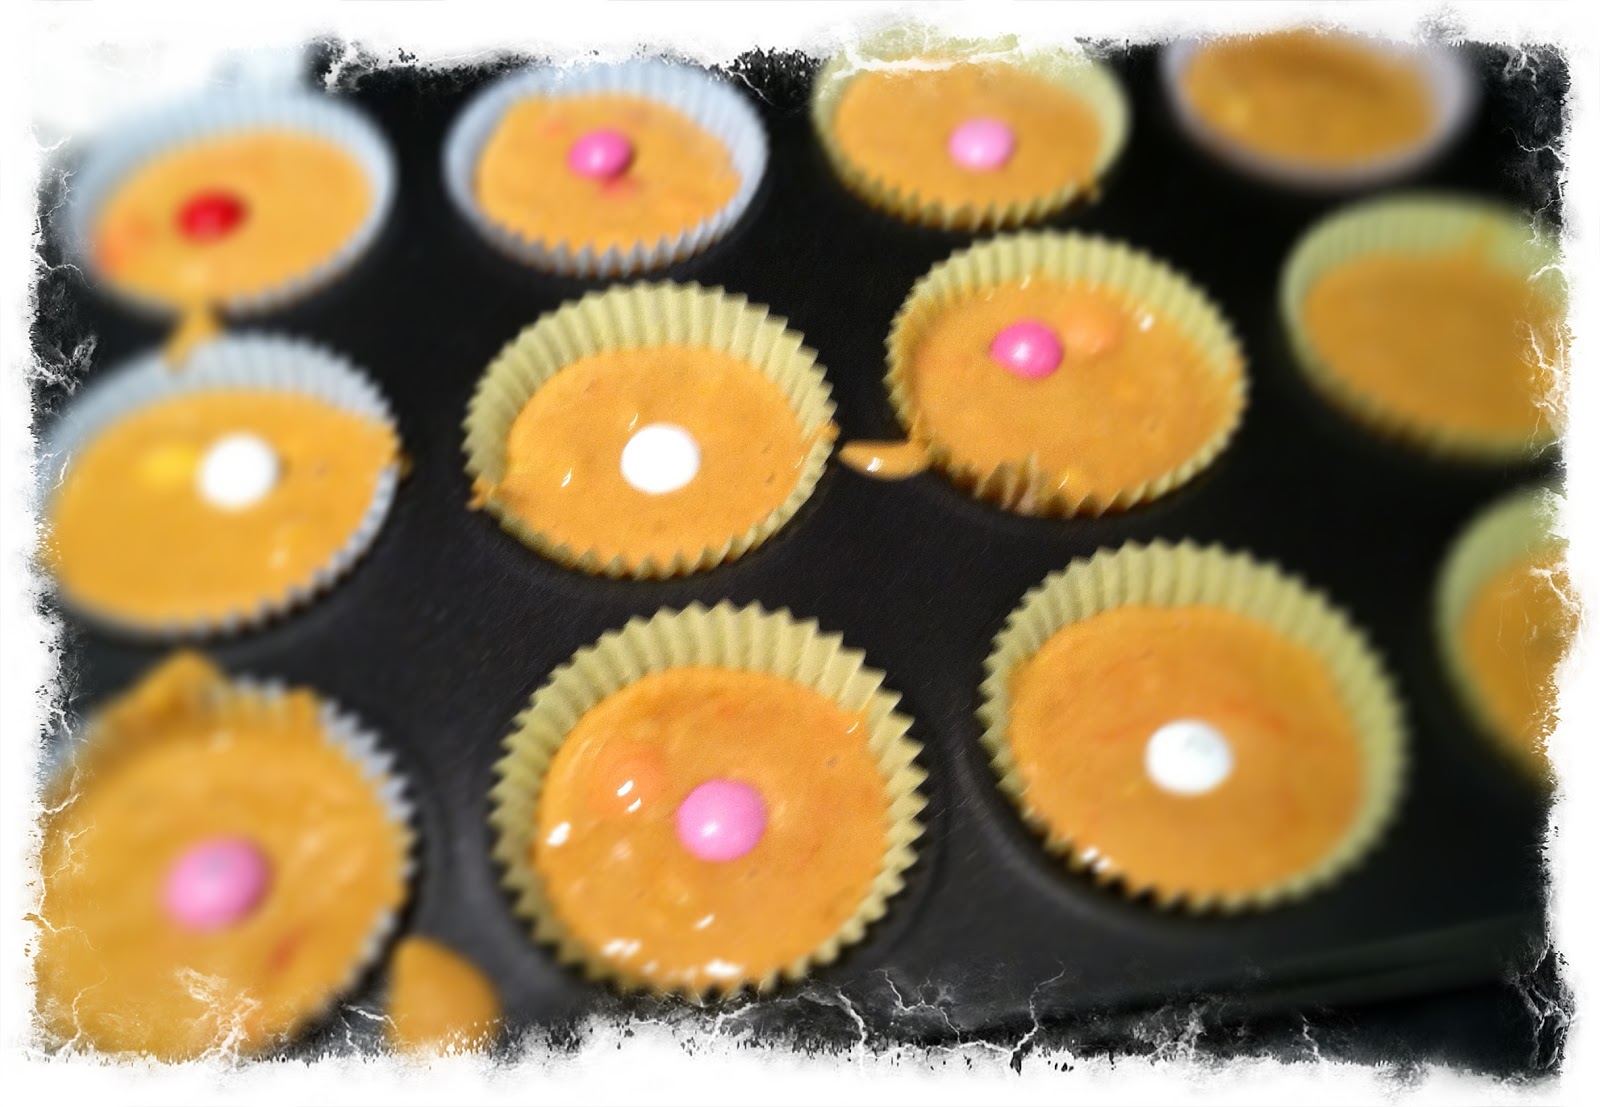
 The recipe was easy enough, and I have to say, they came out really yummy. They are a little heavy, but that is to be expected with 1/2 cup of peanut butter and three banana's and a whole bag of M&M's.
I only changed one thing in the recipe and that was the brand of peanut butter, I actually used something I have never tried before, but in my attempt to be healthier in 2012, I got this brand at the store right after the New Year! It was still unopened if that tells you anything!

So here is the recipe courtesy of Cookies and Cups:
- 3 very ripe bananas, mashed
- 1/2 cup peanut butter- I used Better'n Peanut Butter
- 1/4 cup oil
- 1 egg
- 1/2 cup granulated sugar
- 1/4 cup brown sugar
- 1 1/2 cups of all purpose flour
- 1/2 tsp baking soda
- 1 1/2 tsp baking powder
- 1/2 tsp salt
- 8 oz bag of Reese’s Mini cups- I used peanut butter M&M's
- Preheat oven to 350
- Grease your loaf pan (I used an 8 x 4 pan) with butter or shortening.
- In a medium bowl whisk together your flour, baking soda, baking powder and salt, set aside.
- In a large bowl stir together your bananas, peanut butter, oil, egg and sugars.
- Pour your dry ingredients into your wet ingredients and stir until just combined. Batter will be lumpy.
- Fold in your Reese’s Mini cups and spread batter into prepared pan.
- Bake for approx 1 hour or until toothpick inserted into center comes out clean.
- Let cool in pan for 10 minutes, then loosen the edges of the pan with a knife and remove from loaf pan, transferring bread to a cooling rack.
Enjoy!
Saturday, February 11, 2012
Roasted Red Pepper, Feta and Green Onion Scones

It literally took me all of ten minutes to throw it together, which was perfect! I had been planning a yummy dinner for Josh later that night, so I figured these would be a perfect compliment. Now I will say, I did NOT have heavy cream, but I did have buttermilk and I have seen recipes in the past for scones using buttermilk, so I assumed it would be just fine! It actually was, however, they took much longer to cook, like a LOT longer...I think a good 45 mins and the dough was a little stickier than I would have thought. I did add more flour, but I have a feeling I could have added even more. While they were in the oven I took a look at some other recipes that called for buttermilk while making scones and the amount of flour in most was almost double what I had. So I would say if you do not have heavy cream and have to use buttermilk, add more flour!!!
But regardless, they came out really tasty, I was kind of surprised and relieved to be honest! So overall, I would make these again..but definitely try with the heavy cream next time.

Yields 8 scones
2 cups all-purpose flour
1 tablespoon baking powder
1/2 teaspoon salt
6 tablespoons cold butter, cubed
4 ounces feta cheese
3/4 cup roasted peppers, diced
2 green onions, finely sliced
1 egg, slightly beaten
3/4 cup heavy cream
Preheat oven to 350 degrees F (180 degrees C).
In a large mixing bowl, whisk together flour, baking powder, and salt. Cut in butter with pastry blender or your hands until mixture resembles coarse sand. Stir in feta cheese, roasted peppers, and green onion. Mix in egg and heavy cream until dough comes together.
Turn out on a lightly floured surface, form a ball and flatten it until it is about 1-inch thick. Using a sharp knife, cut 8 equal pie wedges. Transfer scones to a baking sheet and bake for 20-25 minutes, or until lightly browned.
Serve warm or at room temperature.
Enjoy!
Monday, February 6, 2012
Triple Chocolate Cheesecake


As you can tell it is pretty apparent that Becca is not 63, but we like to mess with each other, so why not make the switch!
The Recipe was not too difficult at all to make, quite easy actually, but you would never know it once you taste it!
Again this recipe was adapted from Cooking Light and Back to the Cutting Board. The ingredients below vary a little from what is on her website as I made a few changes...
Ingredients
Crust
- 1/4 cup sugar
- 3 tbsp. margarine, melted
- 1 tbsp. egg white
- 1 1/3 cups chocolate graham cracker crumbs (about 8 full sized crackers)
- 3 (1 oz.) squares semisweet or bittersweet chocolate
- 1/4 cup chocolate syrup
- 2 (8 oz.) package Neufchatel cheese, softened
- 1 cup sugar
- 2 tbsp. unsweetened cocoa
- 1 tsp. vanilla
- 1/4 tsp. salt
- 2 eggs
- 1/2 cup low-fat sour cream
- 1 tbsp. sugar
- 2 tsp. unsweetened cocoa
- Chocolate chip minis
Process
- Preheat oven to 350 degrees (F). Beat sugar, margarine and egg in a small bowl until blended. Add crumbs and stir well. Firmly press mixture into bottom (and 1 inch up sides if you want to attempt it) of an 8-inch or 10-inch springform pan coated with cooking spray. Bake for 10 minutes and let cool.
- Turn oven down to 300 degrees (F).
- Combine rum (if using) and chocolate squares in the top of a double boiler or over low heat. Cook until chocolate melts, stirring frequently. Remove from heat and add chocolate syrup, stirring until smooth.
- In a large bowl, beat cheese with a mixer at medium speed until smooth. Add 1 cup sugar, 2 tablespoons cocoa, vanilla, and salt and beat until smooth. Add chocolate mixture and beat at low speed until well-blended. Add eggs, 1 at a time, mixing well after each addition.

 Pour into the crust and bake for 40 minutes or until almost set (it should giggle just a little if you tap the pan). Combine sour cream, 1 tablespoon sugar, and 2 teaspoons cocoa and stir well. Turn oven off and take out the cheesecake. Spread sour cream mixture over cheesecake and put back in the still warm (but turned off) oven. Let stand for 45 minutes in the oven with door closed. Remove cheesecake and let cool to room temperature. Cover and chill at least 8 hours.
So overall the weekend was a blast, the cheesecake was a hit and good times were had as usual!! Happy Birthday Beccs, love you!!!

Italian Cream Cake

So the day has come, I finally baked my first from scratch birthday cake!!
Tomorrow is my friend Xuan's birthday, however I am unable to see her, so I went ahead and made the cake last week for her! She told me this was her favorite cake and to be honest I was a little nervous. One, because I have not made a cake from scratch and two, I have never tasted this cake so I was not sure if I knew it turned out ok or not when I tested it! Well, to my surprise, it turned out so yummy, she absolutley loved it! I guess I did good!


She liked it so much, she pretty much devoured the whole thing all before her actual birthday!!! Yum de Lum! I have to be honest, when I took the first bite I was kind of on the fence about it. It was right out of the fridge and just seemed so sweet to me. But I saved a piece for Josh and had to take a bite of it at room tempurature and I must say, I was really shocked at how good it was. I would make this cake again and totally reccommend the recipe, which by the way, I found on Allrecipes.com courtesey of Rory!
Italian Cream Cake Recipe:- The only thing I did differently was use two 9 inch rounds vs. three.
For the cake:
1 cup buttermilk
1 teaspoon baking soda
1/2 cup butter
1/2 cup shortening
2 cups white sugar
5 eggs
1 teaspoon vanilla extract
1 cup flaked coconut
1 teaspoon baking powder
2 cups all-purpose flour
For the frosting:
8 ounces cream cheese
1/2 cup butter
1 teaspoon vanilla extract
4 cups confectioners' sugar
2 tablespoons light cream
1/2 cup chopped walnuts
1 cup sweetened flaked coconut
- Preheat oven to 350 degrees F (175 degrees C). Grease three 9 inch round cake pans. In a small bowl, dissolve the baking soda in the buttermilk; set aside.
- In a large bowl, cream together 1/2 cup butter, shortening and white sugar until light and fluffy. Mix in the eggs, buttermilk mixture, 1 teaspoon vanilla, 1 cup coconut, baking powder and flour. Stir until just combined. Pour batter into the prepared pans.
- Bake in the preheated oven for 30 to 35 minutes, or until a toothpick inserted into the center of the cake comes out clean. Allow to cool.
- To Make Frosting: In a medium bowl, combine cream cheese, 1/2 cup butter, 1 teaspoon vanilla and confectioners' sugar. Beat until light and fluffy. Mix in a small amount of cream to attain the desired consistency. Stir in chopped nuts and remaining flaked coconut. Spread between layers and on top and sides of cooled cake.


Subscribe to:
Posts (Atom)